Your First Transaction
This guide will introduce how to quickly access and use the AxiomLedger blockchain. You can easily initiate transactions, mint tokens through our guides and view block and transaction information through AXMScan. The following steps will take the Taurus testnet as an example. If you want to try it on the mainnet or other testnets, you can view related resources on the Resources page.
Wallet Configuration
AxiomLedger is an EVM-compatible blockchain, which means that any Ethereum tools you are familiar with can be used on AxiomLedger, including Truffle, Remix, and ether.js. All you need is an Ethereum-based account address, using popular wallets like Metamask or an SDK.
If you are using MetaMask for the first time, please click here to install the plugin. If you are connecting to AxiomLedger for the first time, you need to add RPC address, chain ID, token symbol, and other required information to the network list. The chain information of the mainnet and testnets can be viewed on the Resources page.
After successfully connecting to the AxiomLedger, your account balance will generally be 0 AXC. At this time, you can visit the AxiomLedger testnet faucet and enter your account address on the webpage to receive some AXCs.
Please note: Within a 24-hour period, each account can only obtain AXC once from the faucet.
Generate Your First Transaction
If you want to learn more about AxiomLedger, such as getting more information on the chain or initiating transactions on the chain, it is recommended that you use the official SDK (axiom.js). This SDK is similar in usage to ether.js.
Copy the code below and save it as a file with the .mjs extension. Replace the sender’s private key and the recipient’s address in the code with those of your test account (i.e., replace account_from and account_to). Then, run node YourFileName.mjs (make sure you have Node.js installed beforehand). Wait for the terminal to return the transaction hash, which indicates a successful transaction. At this point, you can check whether the balance in Metamask has been updated. If there is a network delay, you can check later. You can also paste the returned transaction hash into AXMScan to view the transaction details.
Please note: If you have a proxy service running on your computer, it may cause transaction failures. You can try again after disabling the proxy.
// Javascript
// Setup: npm install @axiomesh/axiom
import { ethers } from '@axiomesh/axiom'

const provider = new ethers.JsonRpcProvider("https://rpc1.taurus.axiomesh.io");

async function main() {
  // query the BlockNumber on AxiomLedger
  const latestBlock = await provider.getBlockNumber();
  console.log("The latest block number is", latestBlock);

  // send transaction to AxiomLedger : transfer AXC
  // step1. Create account variables
  const account_from = {
    privateKey: 'YOUR-PRIVATE-KEY-HERE',
  };
  const account_to = {
    address: 'ADDRESS-TO-HERE',
  };

  // step2. Create wallet
  const wallet = new ethers.Wallet(account_from.privateKey, provider);
  // step3. Create tx object
  const tx = {
    to: account_to.address,
    value: ethers.parseEther('0.1'),
  };
  // step4. Sign and send tx - wait for receipt
  const createReceipt = await wallet.sendTransaction(tx);
  await createReceipt.wait();
  console.log("Transaction successful with hash:", createReceipt.hash);
}

main();
Mint a Token
If you have successfully connected to the AxiomLedger network and have experienced the basic usage of the AxiomLedger official SDK in the previous steps, you can now mint your own Token on AxiomLedger. Generally, this requires you to write or prepare an ERC20-compliant smart contract in advance, and successfully deploy it on the AxiomLedger blockchain, add the contract address to the wallet software like Metamask, and then you can view your newly minted Token.
To simplify your usage, we provide with a simple smart contract sample. You only need to modify the Token name (for example, TAXM) with it(the location to be modified is at lines 62-63 of the smart contract code below). Of course, you can also use this contract as a reference to develop a smart contract that better meets your needs.
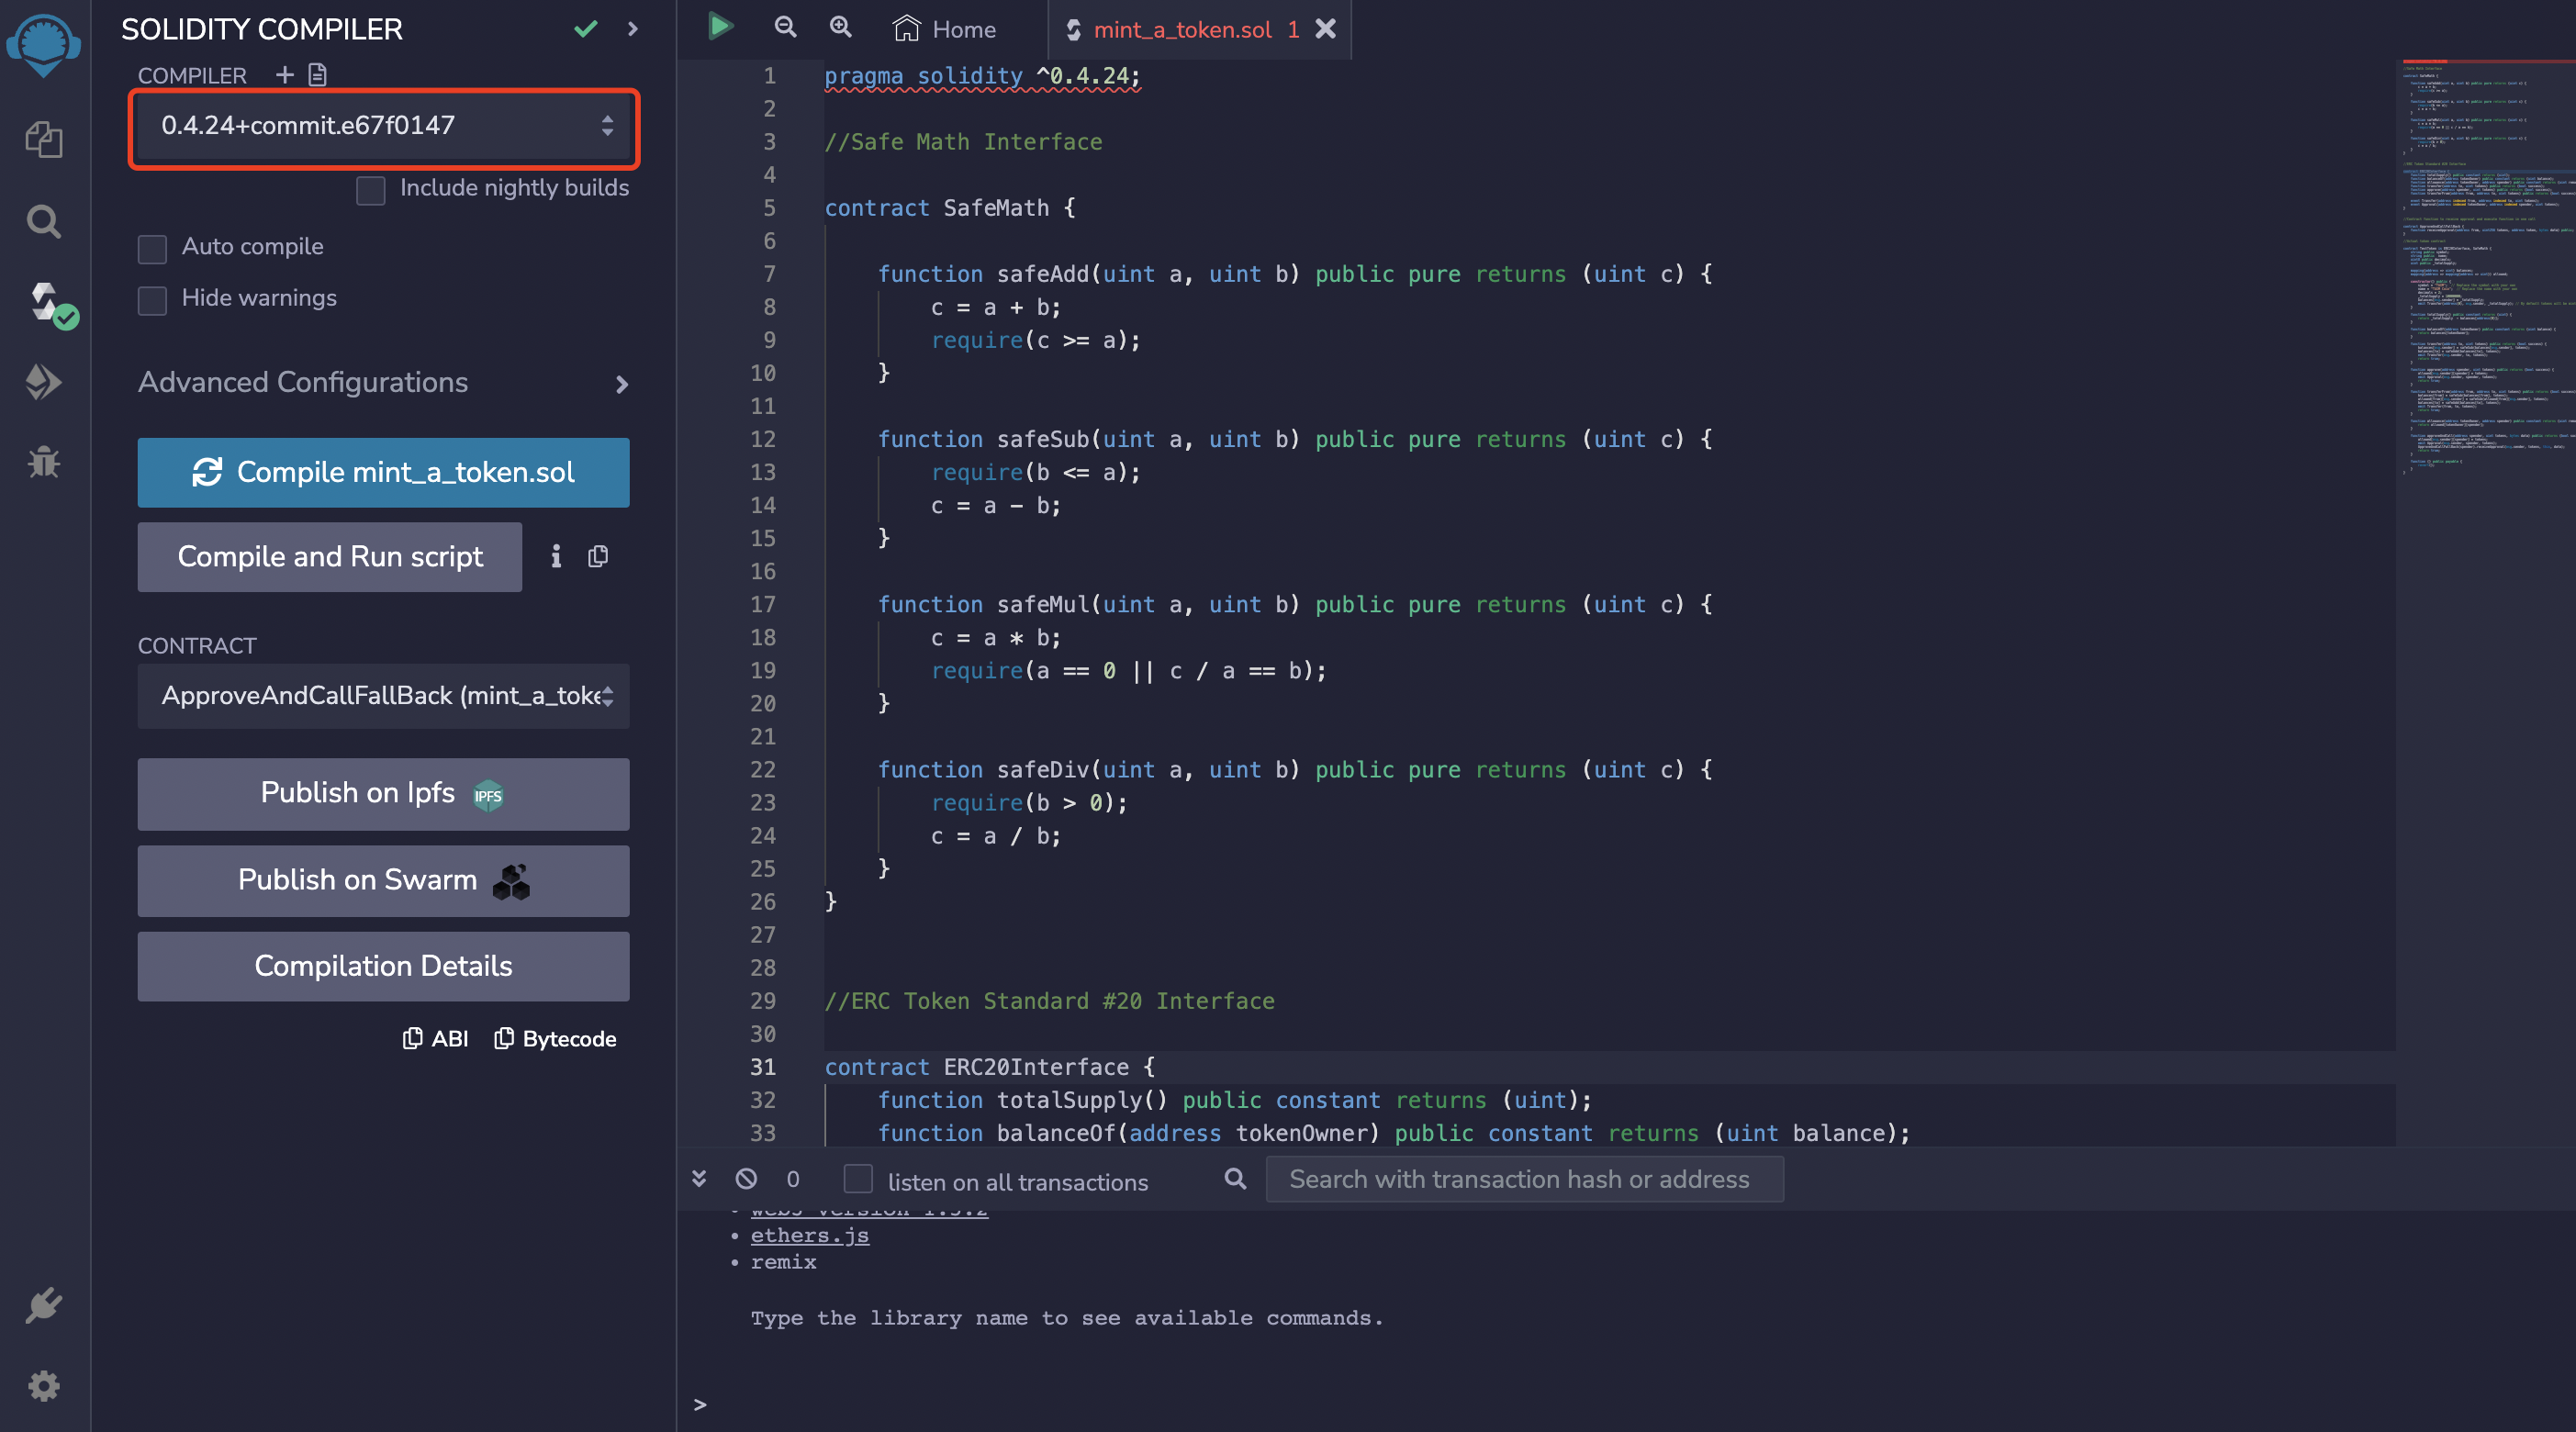
If you already have a basic understanding of Ethereum, you can compile and deploy this smart contract on Remix.
pragma solidity ^0.4.24;

//Safe Math Interface

contract SafeMath {

    function safeAdd(uint a, uint b) public pure returns (uint c) {
        c = a + b;
        require(c >= a);
    }

    function safeSub(uint a, uint b) public pure returns (uint c) {
        require(b <= a);
        c = a - b;
    }

    function safeMul(uint a, uint b) public pure returns (uint c) {
        c = a * b;
        require(a == 0 || c / a == b);
    }

    function safeDiv(uint a, uint b) public pure returns (uint c) {
        require(b > 0);
        c = a / b;
    }
}


//ERC Token Standard #20 Interface

contract ERC20Interface {
    function totalSupply() public constant returns (uint);
    function balanceOf(address tokenOwner) public constant returns (uint balance);
    function allowance(address tokenOwner, address spender) public constant returns (uint remaining);
    function transfer(address to, uint tokens) public returns (bool success);
    function approve(address spender, uint tokens) public returns (bool success);
    function transferFrom(address from, address to, uint tokens) public returns (bool success);

    event Transfer(address indexed from, address indexed to, uint tokens);
    event Approval(address indexed tokenOwner, address indexed spender, uint tokens);
}


//Contract function to receive approval and execute function in one call

contract ApproveAndCallFallBack {
    function receiveApproval(address from, uint256 tokens, address token, bytes data) public;
}

//Actual token contract

contract TestToken is ERC20Interface, SafeMath {
    string public symbol;
    string public  name;
    uint8 public decimals;
    uint public _totalSupply;

    mapping(address => uint) balances;
    mapping(address => mapping(address => uint)) allowed;

    constructor() public {
        symbol = "TAXM";  // Replace the symbol with your own
        name = "TAXM Coin";  // Replace the name with your own
        decimals = 2;
        _totalSupply = 10000000;
        balances[msg.sender] = _totalSupply;
        emit Transfer(address(0), msg.sender, _totalSupply); // By default tokens will be minted on the address who deploy the smart contract
    }

    function totalSupply() public constant returns (uint) {
        return _totalSupply  - balances[address(0)];
    }

    function balanceOf(address tokenOwner) public constant returns (uint balance) {
        return balances[tokenOwner];
    }

    function transfer(address to, uint tokens) public returns (bool success) {
        balances[msg.sender] = safeSub(balances[msg.sender], tokens);
        balances[to] = safeAdd(balances[to], tokens);
        emit Transfer(msg.sender, to, tokens);
        return true;
    }

    function approve(address spender, uint tokens) public returns (bool success) {
        allowed[msg.sender][spender] = tokens;
        emit Approval(msg.sender, spender, tokens);
        return true;
    }

    function transferFrom(address from, address to, uint tokens) public returns (bool success) {
        balances[from] = safeSub(balances[from], tokens);
        allowed[from][msg.sender] = safeSub(allowed[from][msg.sender], tokens);
        balances[to] = safeAdd(balances[to], tokens);
        emit Transfer(from, to, tokens);
        return true;
    }

    function allowance(address tokenOwner, address spender) public constant returns (uint remaining) {
        return allowed[tokenOwner][spender];
    }

    function approveAndCall(address spender, uint tokens, bytes data) public returns (bool success) {
        allowed[msg.sender][spender] = tokens;
        emit Approval(msg.sender, spender, tokens);
        ApproveAndCallFallBack(spender).receiveApproval(msg.sender, tokens, this, data);
        return true;
    }

    function () public payable {
        revert();
    }
}
Please note:
- Ensure that you select the appropriate Solidity version when compiling the contract(^0.4.24).
- When deploying the contract through the injected provider - MetaMask, please confirm that the network has been switched to the AxiomLedger’s network and the account address matches your selection.
- Choose a contract that can correctly generate Token (such as
TestTokenin this case)
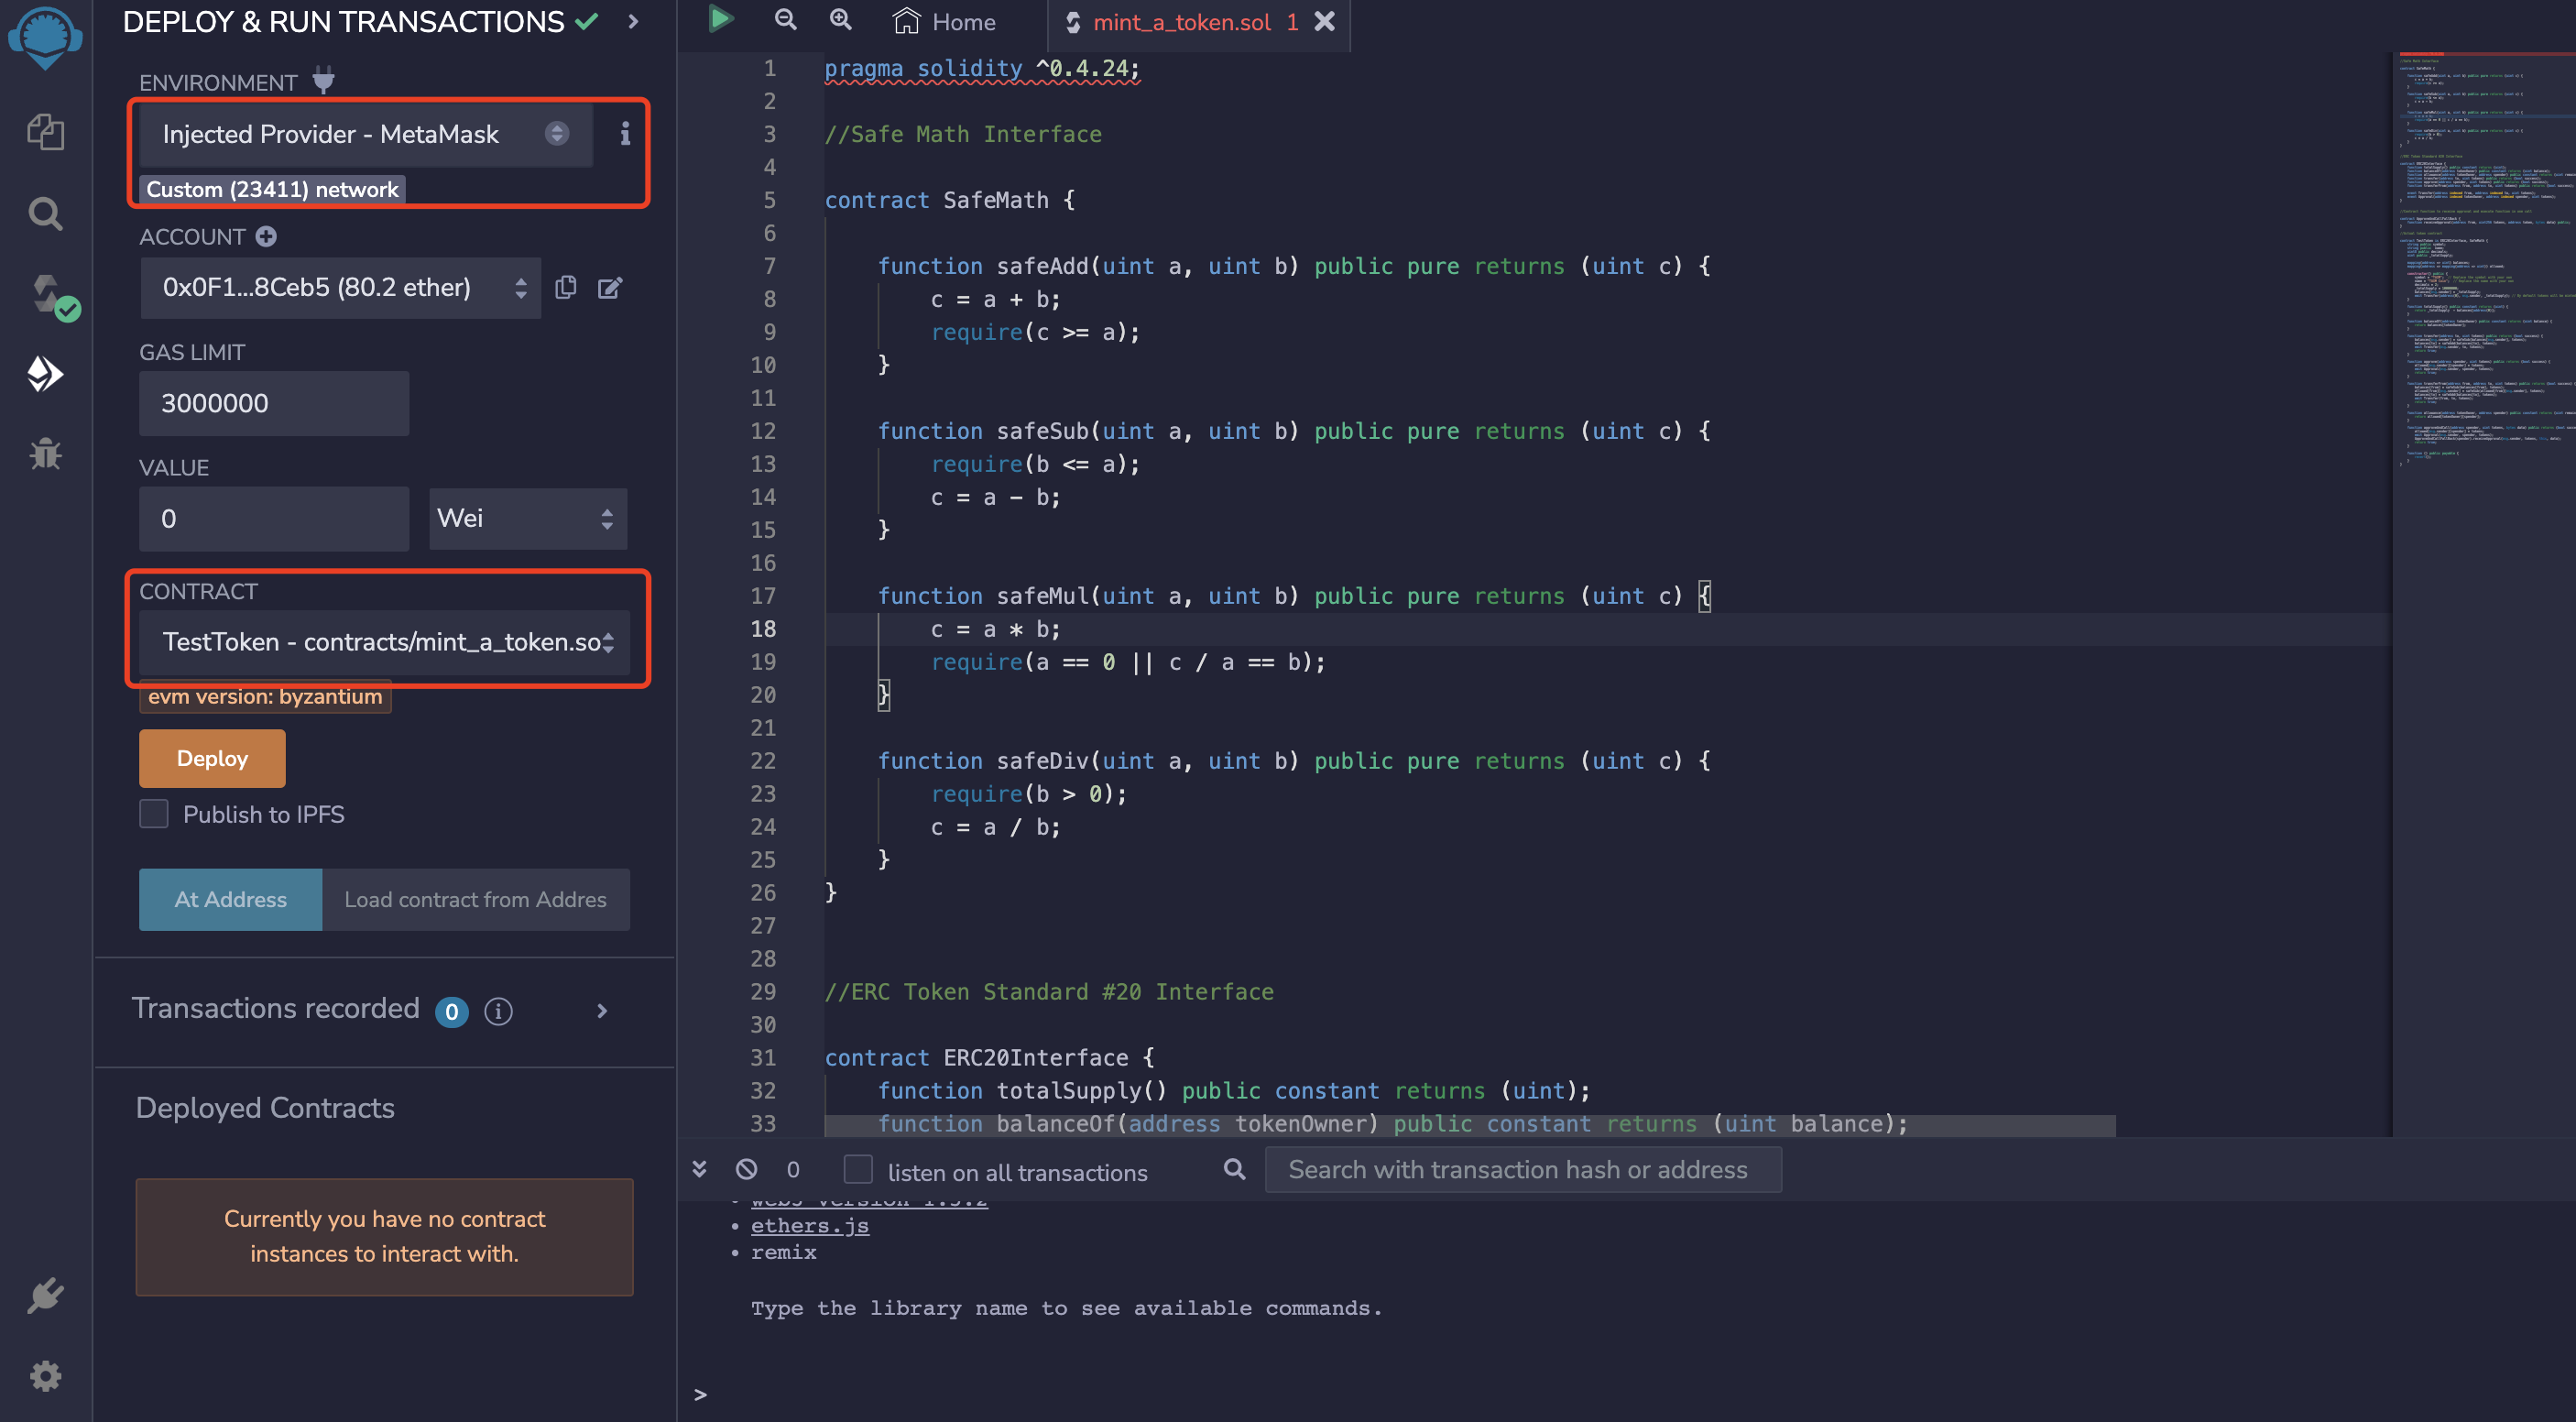
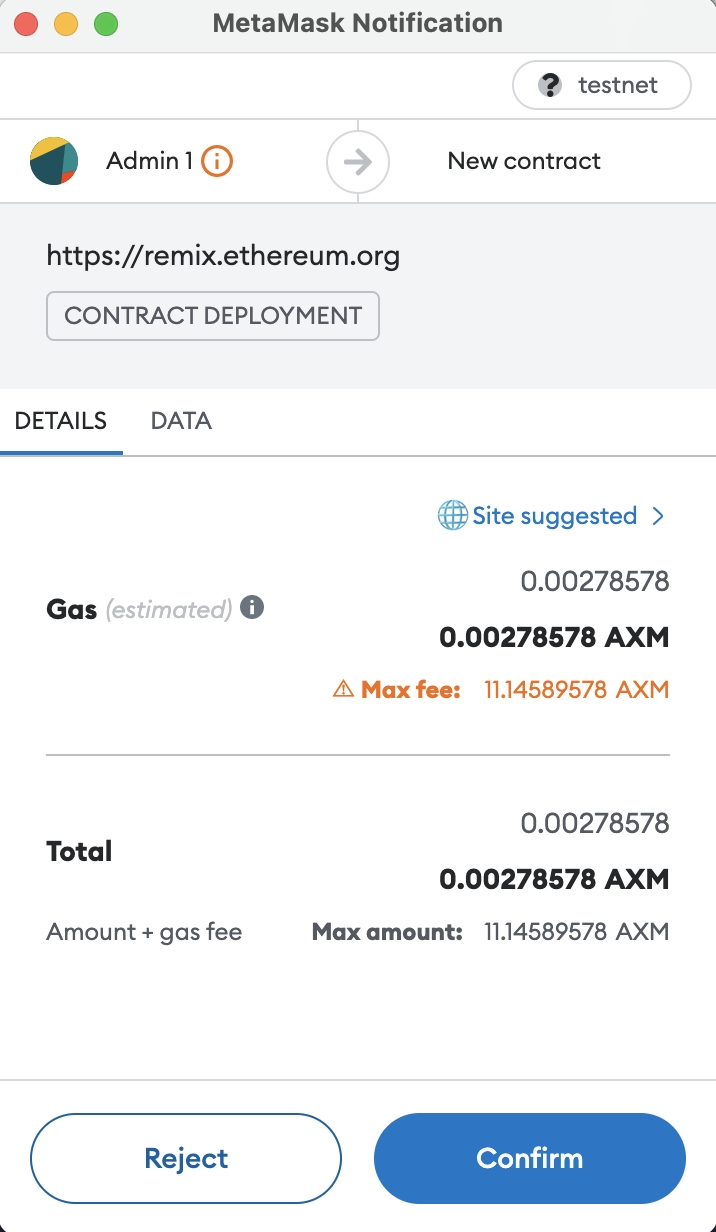
Click the Deploy button on the page, check the transaction details in the MetaMask pop-up box, and click Confirm to send a transaction request to deploy the smart contract.
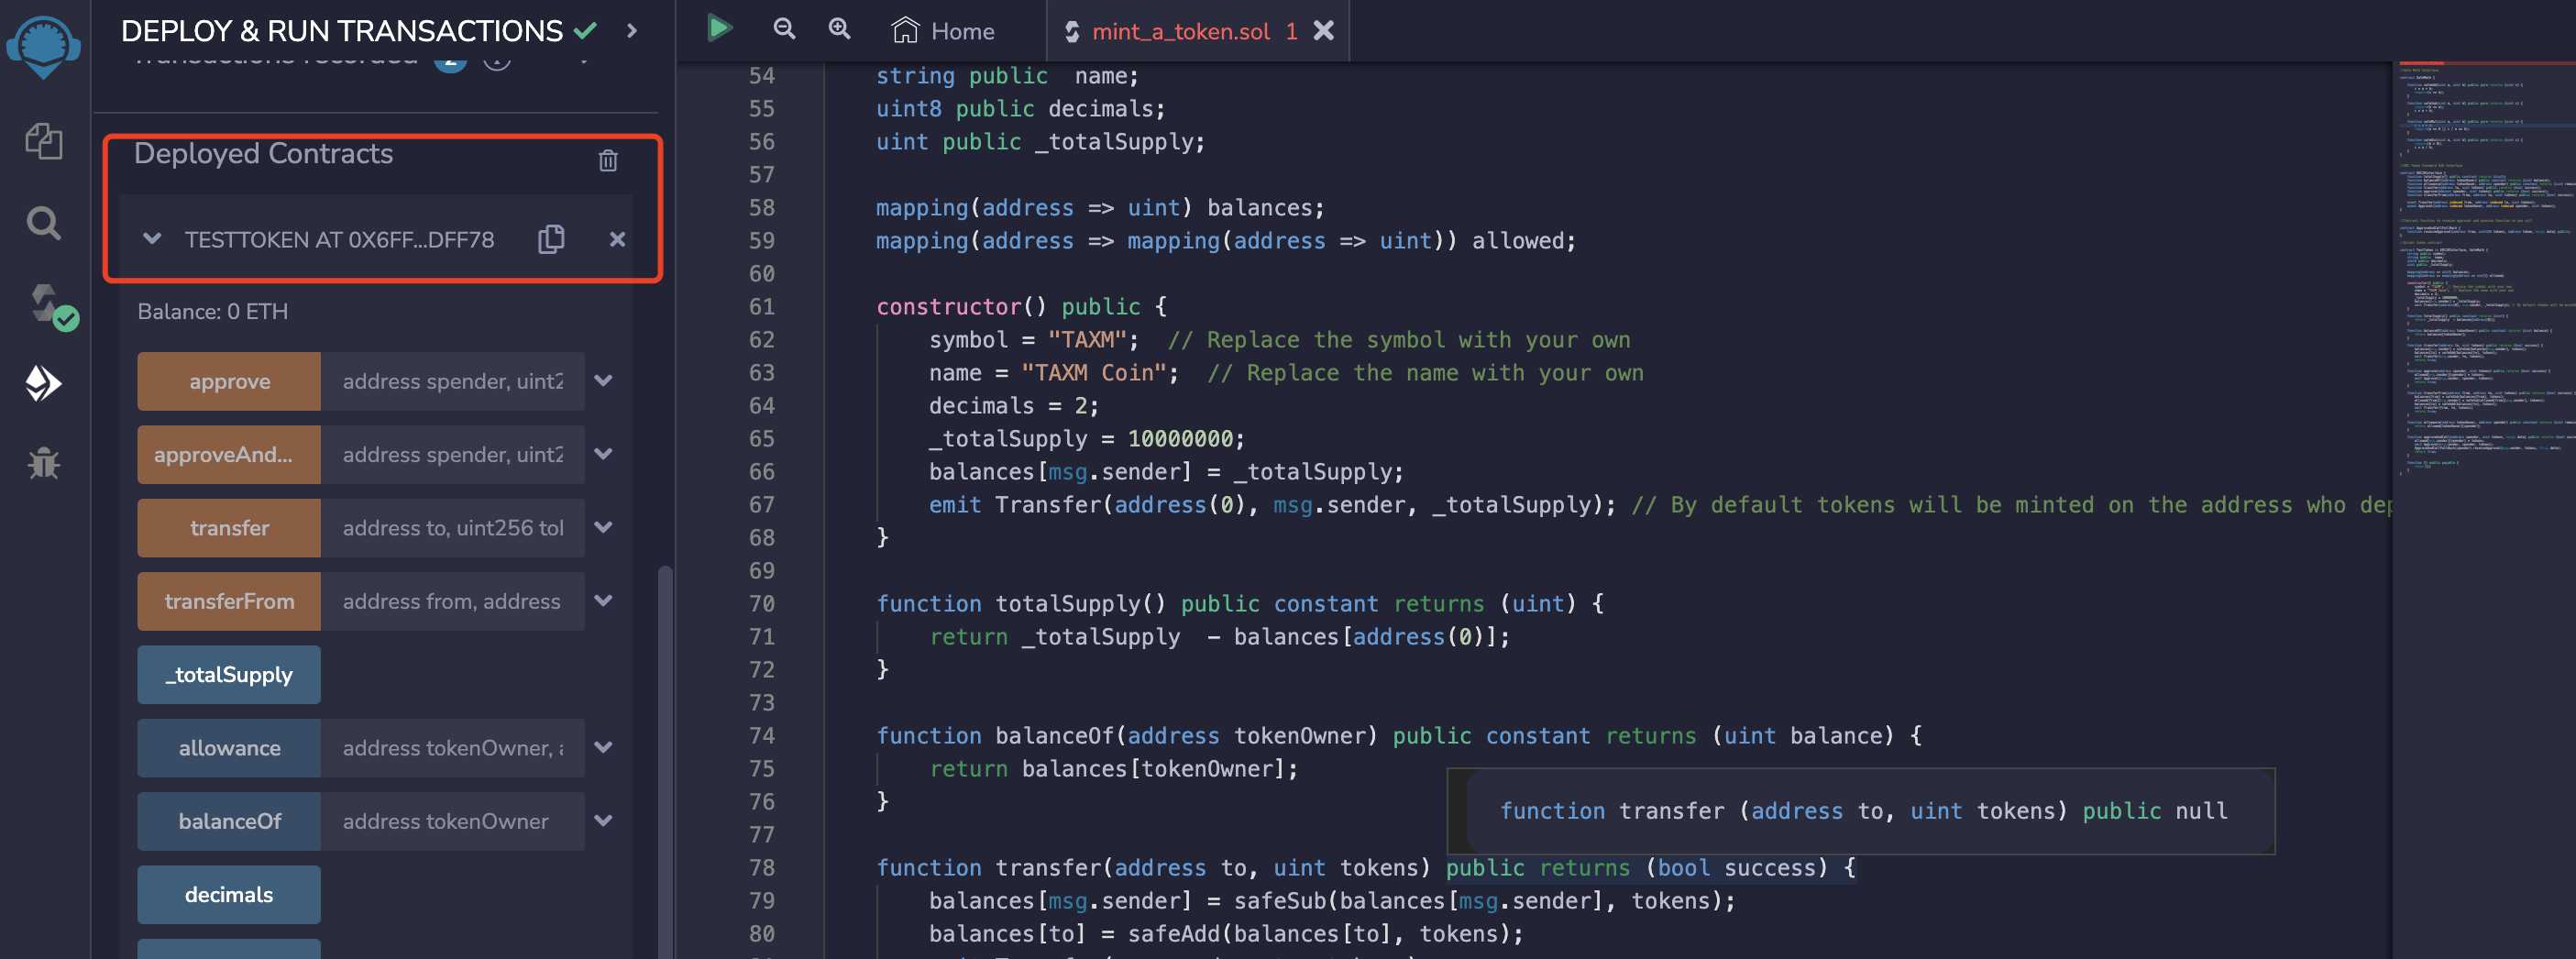
After the smart contract has been deployed, you can find the address of the smart contract, the calling method and other information on Remix. Copy the address of the contract, then select Add Token on MetaMask and paste the address. After that, click Next to view the balance of the newly minted Token on this address.
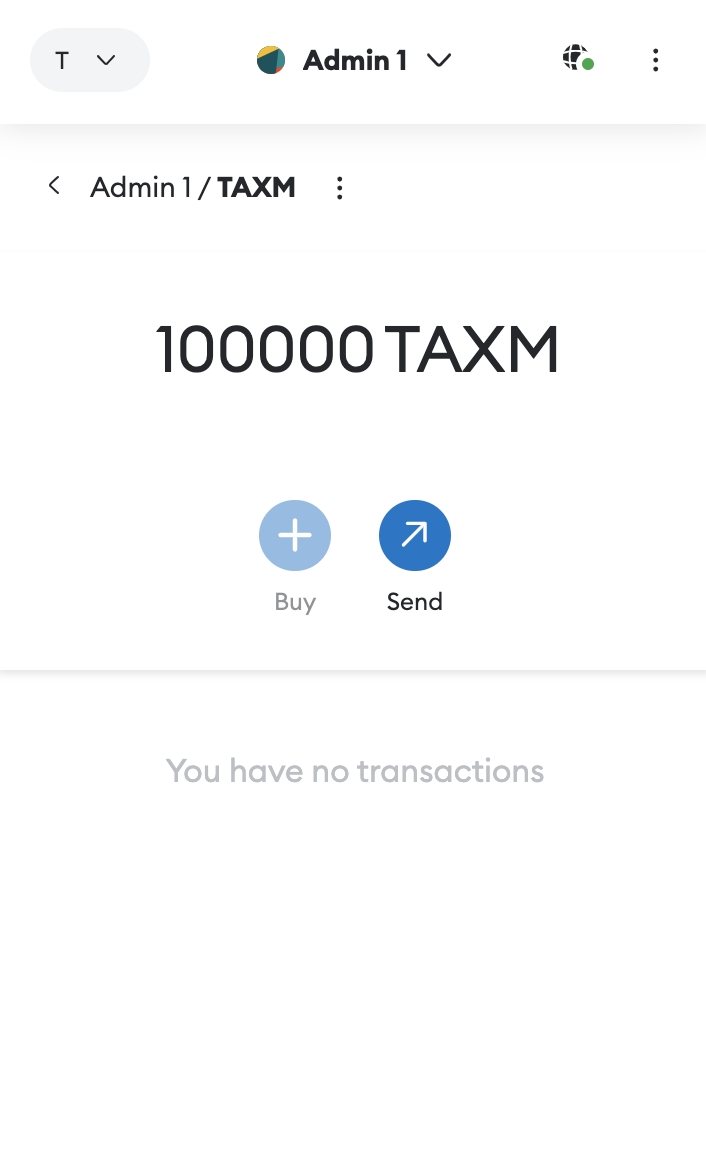
So far, you have successfully deployed the ERC20 standard smart contract on the AxiomLedger and minted your own Token! Of course, you can also complete the deployment of smart contracts using SDK. For specific operations, please refer to ether.js.
Transfer Tokens
You have completed the minting of Token in the previous steps. Now, you can try to transfer your Token. To make this process more intuitive and clear, it is recommended that you use the Remix and MetaMask to transfer your Token.
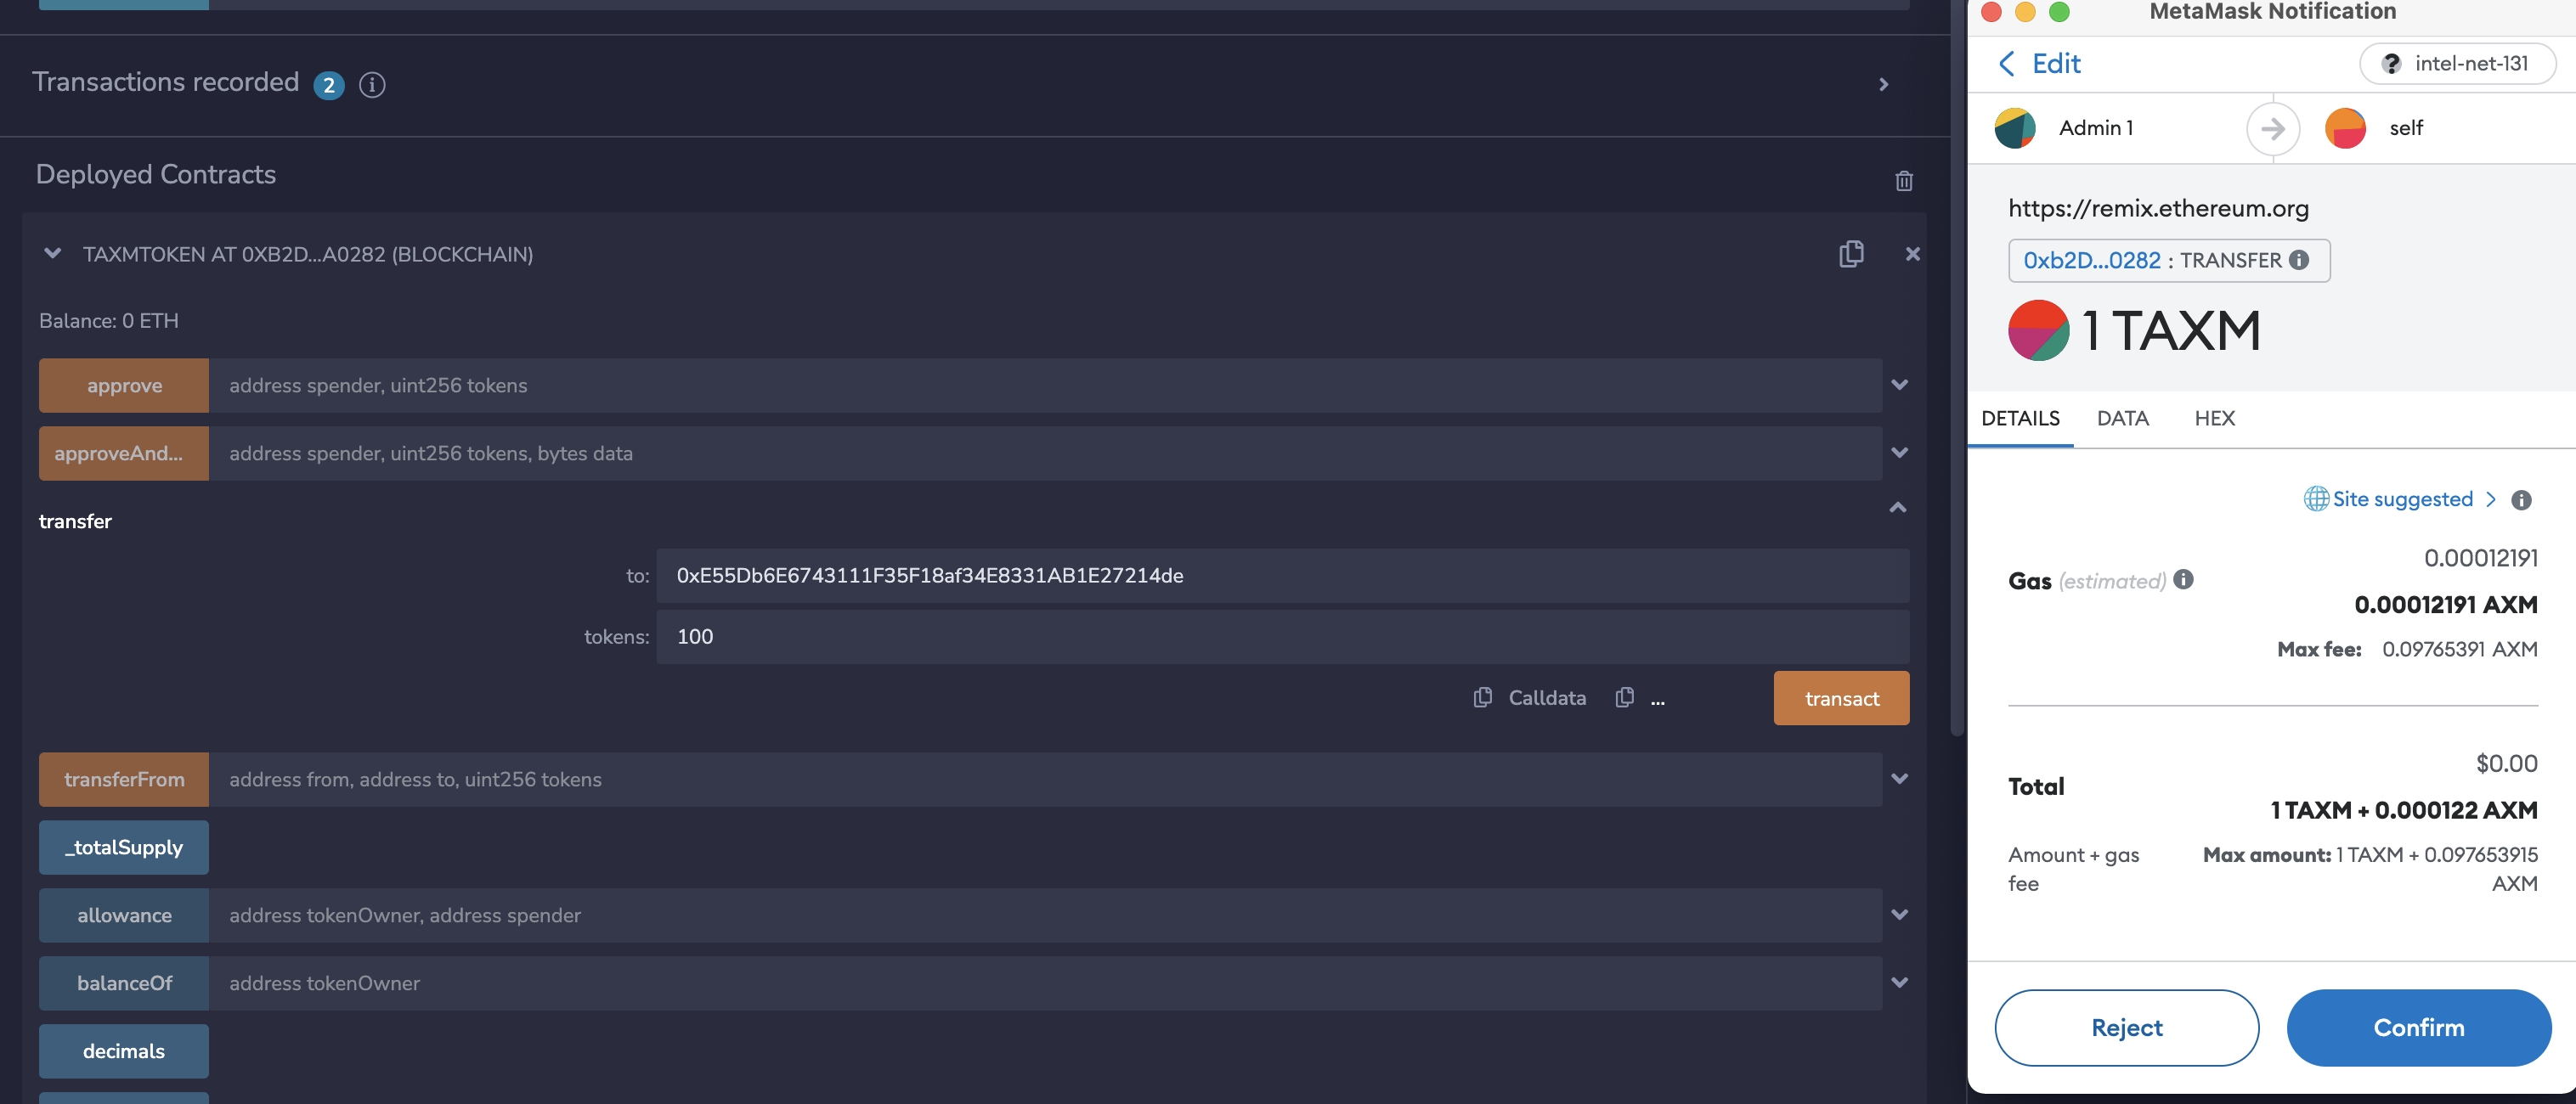
First, choose an account to receive the Token. Then, call the transfer method at the bottom of the page where the contract was deployed just now (you will need to provide the address of the receiving account and the transfer amount). Finally, confirm the transaction in the MetaMask pop-up box.
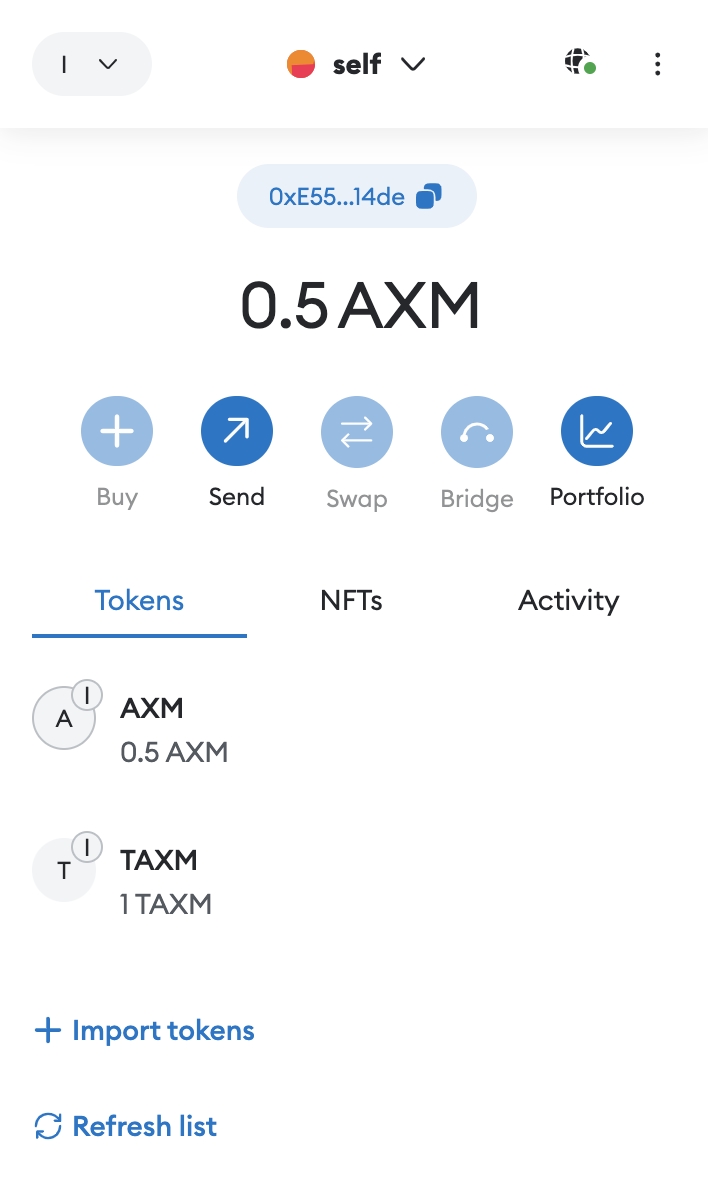
After the transfer is completed, you can switch to the receiving account address on MetaMask to check its balance, and verify that it has received the Token.
Use Blockchain Explorers
AxiomLedger offers an official blockchain explorers - AXMScan. While interacting with the AxiomLedger blockchain, you can access block and transaction information from the testnet at any time. You can find more about how to use AXMScan here.